Drawing, after Nicolai FechinPart 1 of 3 |
|||||||||||||||||
Painterly charcoal drawingWhy engage in old master copies?
Nicolai Ivanovich Fechin (1881-1955) was a Russian artist who studied under Ilya Repin, and was to later emigrate to the US. He is not widely known, though had notable recognition in his day and those familiar with his work usually have great admiration. Fechin was able to blur the line between the academic artists and the impressionists, which is visible in both his drawings and paintings alike. In doing this study my personal aims were several. I wished to undertake the study during a morning, afternoon or evening in order to preserve a sketchy feel, which is often lost in any drawing that is laboured over too intensely. I am less interested in capturing every feature precisely, and more interested in capturing the overall impression, even if that meant losing the likeness. I wanted to translate some of that painterly feel as best as I could with charcoal with a careful attention to edges. I also wished to capture some of the expression that Fechin portrays with such apparent ease. What does painterly mean?Painterly is surely a term hotly debated in many art groups. It is hard to put a tangible definition to the word, but look at a Van Gogh and then a Da Vinci and ask which you consider to be painterly? Painterly works often show bold brushstrokes, and areas of abstraction or suggestion. A sketchy appearance is not to say the work has not been carefully laboured over. Put your face up to an Anders Zorn or a John Sargent and you might only see an abstract tangle of competing strokes and colour, but pull back and those strokes blend into masterful and sensitive paintings with blended edges and subtle tone.
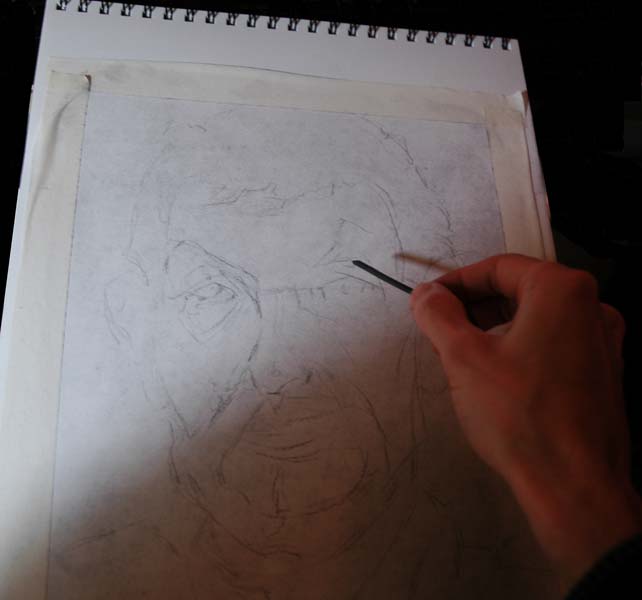
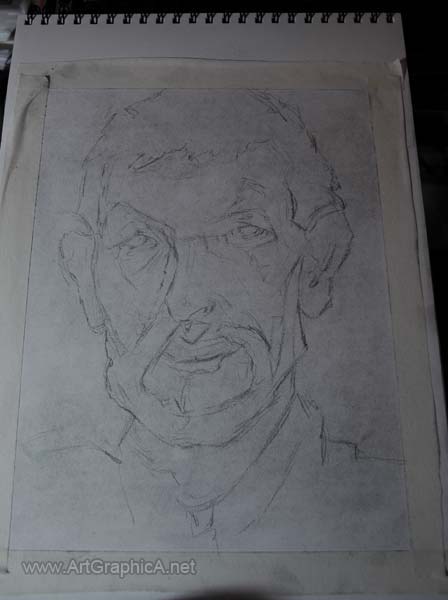
ART MATERIALS The materials used are both inexpensive and few. I use Coates willow vine charcoal (thin), a General’s peel and sketch pencil, a chamois leather, putty eraser, masking tape, a blending stump and three different paint brushes: A number 6 da vinci series 1015 pastel blending brush. A number 8 da vinci series 132 pastel blending brush and a cheap unbranded soft hair generic paintbrush bought long ago from goodness knows where. Any combination of soft or even bristle brush will suffice. The paper is an unbranded relatively thick cartridge paper from an inexpensive sketchbook. Preliminary DrawingIf you want to maintain a crisp border to your work then simply lay down masking tape along the four edges. For the short amount of time it takes, I find it satisfying to peel it off at the end, allowing the white of the paper to create its own sort of frame. Please excuse some of the photos. I started the drawing late in the evening, under a small artifical lamp, and had to finish the following morning.  If you rub your vine charcoal stick onto sandpaper and allow the dust to randomly scatter over your paper, you can take a chamois leather and softly rub it in a circular motion. I blow off the excess dust, and then rub horizontally, and then vertically until there’s a fairly even but very subtle covering. By doing this, I find it easier to subsequently draw on the paper, and you can pick out the brightest highlights with a putty eraser at the end, knowing they are not competing with other areas for the same intensity of brightness.  Try to use the longest stick of charcoal you can find (i.e. not like the little stick shown in the photo above), keep your drawing at arm’s length, and make sure your paper is perpendicular to your line of sight to avoid perspective distortions. Avoid resting your hand on the paper, it will restrict freedom of movement, and will also leave an imprint where you have toned the paper. There are many methods to drawing the face, with far too much scope to cover in this small tutorial. I vary my own methods from time to time, and in this instance I work fast with the intent of correcting later as I go. I don’t tend to commend the approach, because once you have lines down, the brain sees those lines and usually doesn’t want you to move things around. The reason I have employed it is two-fold. Firstly by working quickly, my brain isn’t being too analytical (try gesture drawings or blind contour drawings, and you might surprise yourself with what you can achieve), and secondly I know when I start pushing down tones later on, I will lose just about everything I have already drawn, and it will require almost an entire redraw. You may notice I’ve marked into some of the shadow shapes. These lines will disappear later, but in doing so I can better gauge proportions and shapes to make sure my drawing isn’t horrendously disproportionate. The drawing process is hard to describe. I tend to look for shapes and angles. Do not focus on small details, just try to capture the overall form and larger shapes. If it helps, squint too, as this will remove any cumbersome details. I like to work all over the drawing, trying to see it as a whole, and not focusing on any one small area for long. I also make mental measurements, such as looking at the edge of an eye, and then following an imaginary vertical line to see where that might tie in with the edge of the mouth, or curve of the jawline. When doing the angles of the head, I mentally ask myself, how does that angle relate to a pure vertical or horizontal line? Drawing in this way is a little bit like playing pool or snooker, lining up the cue ball to take a shot, but then also planning the rebound to plan the following move – it’s all about angles. Straight lines are easier than curves, so if you don’t want to lay in a curve, draw a series of straight lines, then add your curve afterwards. I don’t claim to be very good at it, but it is something that gets easier with experience and allows you to draw at a reasonable pace. Lesson continues... Click below to see part two. Click to View PART TWO of PAINTERLY DRAWING
|
|||||||||||||||||
Charcoal Lessons
Charcoal |
 This is an old master portrait study in charcoal, after an oil painting by Nicolai Fechin. There are many benefits in making studies after masterful artists. You should not be afraid of realising how poorly your work may measure by comparison because revealing weaknesses is a way in which we can learn how to improve. You should also make a plan of how you are going to tackle the study and ask yourself what lessons you hope to gain before you even pick up your paper.
 It becomes evident that drawing is not painting, and we cannot pick up an abundance of medium onto our drawing implements and create a thick impasto work. I think it nonsensical to try and draw a replicated brushstroke, so instead it is better to let the medium you are using, just be itself. Fortunately uncompressed charcoal is easily manipulated, meaning you can push it around with a finger, brush or tissue to create something that you might call painterly. Uncompressed charcoal usually comes in a stick like form, made from willow tree (or other types of vine like trees); it’s malleability is both its blessing and curse, because the lightest accidental smudge will likely destroy part of your work. This calls for protective measures which I will come to later in the lesson. Compressed charcoal usually provides darker tonal variety, and is harder to remove and does not blend quite so freely. It can be purchased in block form or in pencil form. I prefer General’s peel and sketch pencils, because you can very easily expose as much charcoal as you wish without fear of snapping the core.


