Drawing an Arch, Perspectively CorrectWetcanvas Basic 101 Class |
|||||||||||||
Wetcanvas Guest Lecture by Deborah Leger
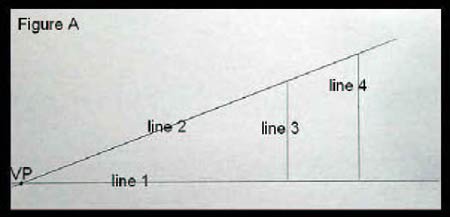
OverviewDrawing arches can be a formidable task, often resulting with a drawing NOT containing the desired arches and many scrunched up pieces of paper tossed in the waste basket, as well as a lot of frustration. Here’s an easy way to draw them, and have them look good, perspectively, too! In Figure A, we’ve already set our horizon line (line 1) and vanishing point. Line 2 represents the top of the arch. Lines 3 and 4 are the sides of the arch.  The next little trick is to draw diagonal lines from opposite corners of lines 3 and 4. Where the two diagonal lines (lines 5 and 6 in figure B) cross is our centre. Finding the centre this way can be very helpful in many circumstances. 
Line 7 in Figure C helps us find the horizontal centre of the cube area, while line 8 defines the vertical centre, which is where the very upper peak of our arch will touch. 
Figure D shows the arch drawn in marker over the lines. I decided to start the angle of the arches up higher than the centre line, so I drew another line, line 4, to show this area where the arches begin to curve. The corner closest to you is always made slightly larger, since being closer to you, you will see more of it than the corner farthest from you. Round the tops and you have your arch. 
Putting Some Arches TogetherOur finished bridge is going to have four arches in total. Figure E shows the basic lines drawn out. Line 1 is the horizon line. Line 2 is the bottom of the arches, while line 3 is the top of the arches. Line 4 is the top of the bridge. 
Basically, what will be done here is to set, side by side, the ‘boxes’ of arches we’ve just learned how to draw. But we don’t want the sides of each arch to be touching it’s neighbour, so I’ve drawn a line on each side of each ‘arch box’ which will serve as the sides of the arches. If you’re not sure what I’m trying to say, just take a look at the finished bridge and you’ll see how there is a distance between each. 
In Figure G, the two diagonal lines are drawn in for each arch. This gives us our centres. 
In Figure H, line 1 is drawn to indicate where I was going to start curving the shape of the arches. Drawing this line for this purpose will ensure that each arch curves at the right spot. 
Figure J shows the arch tops drawn in. Notice how the sides of each arch follow the inside lines of each “arch box”. 
To make the arches look dimensional, I drew in the “depth” of each arch as in Figure K. 
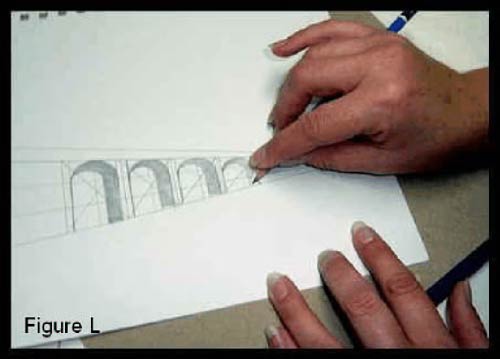
Now, we’re getting down to the easy parts! Shading and drawing! A portion of the finished arched bridge is shown below. Have fun!!  
Article, Copyright Deborah Leger, 2005
|
|||||||||||||


